

Spring break nails 2026 should be bright, durable, and designed to survive sand, salt water, sun cream, and non-stop photography — and the best choices right now are gel sets in neon solids, tropical nail art, ocean-inspired ombres, vacation-themed press-ons, and bold graphic designs that photograph vividly in natural outdoor light. If you’re heading somewhere warm this spring break, this guide gives you 25+ original vacation-ready nail design ideas — organized by vibe and destination — with exact steps and product picks so your nails are fully beach-ready before you leave.
Why Spring Break Nails 2026 Hit Different This Year

Spring break nail trends in 2026 have fully divorced from the broader “spring nails” conversation — and that’s a good thing. Vacation nails have their own rules. They need to survive chlorine, seawater, sunscreen, sandy hands, and endless grip-and-peel moments that destroy regular polish in hours. They need to look incredible in outdoor photos where saturated, high-contrast colors read better than pastels. And they need to match the energy of someone who is genuinely off the clock and living their best life. The nail design ideas that deliver all of that in 2026 are bolder, brighter, and more unapologetically fun than anything you’d wear to the office — and every single one in this guide is completely original, unseen in any of the previous articles in this series.
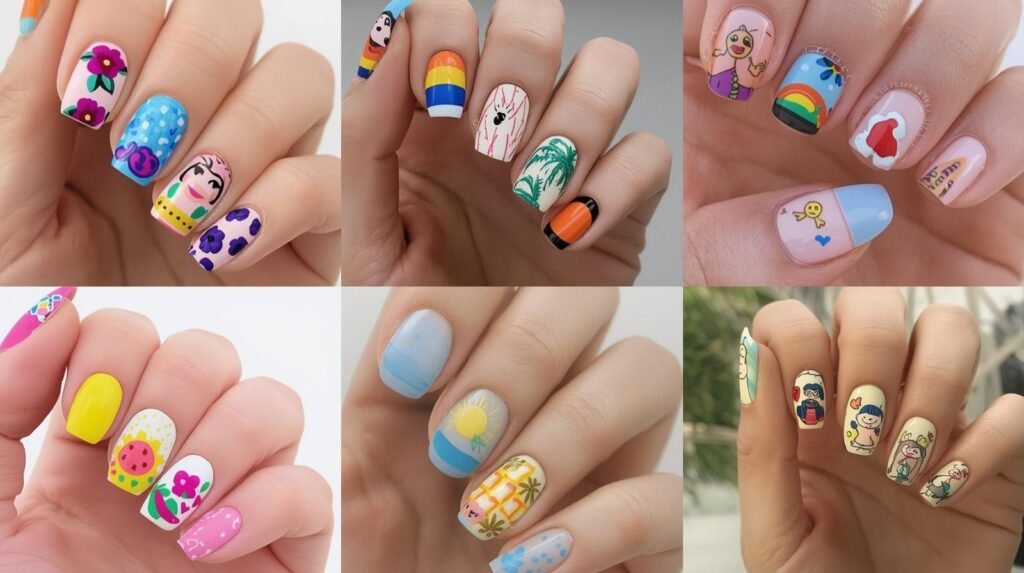
25+ Spring Break Nail Design Ideas for 2026
1. Neon Mango Orange Nails
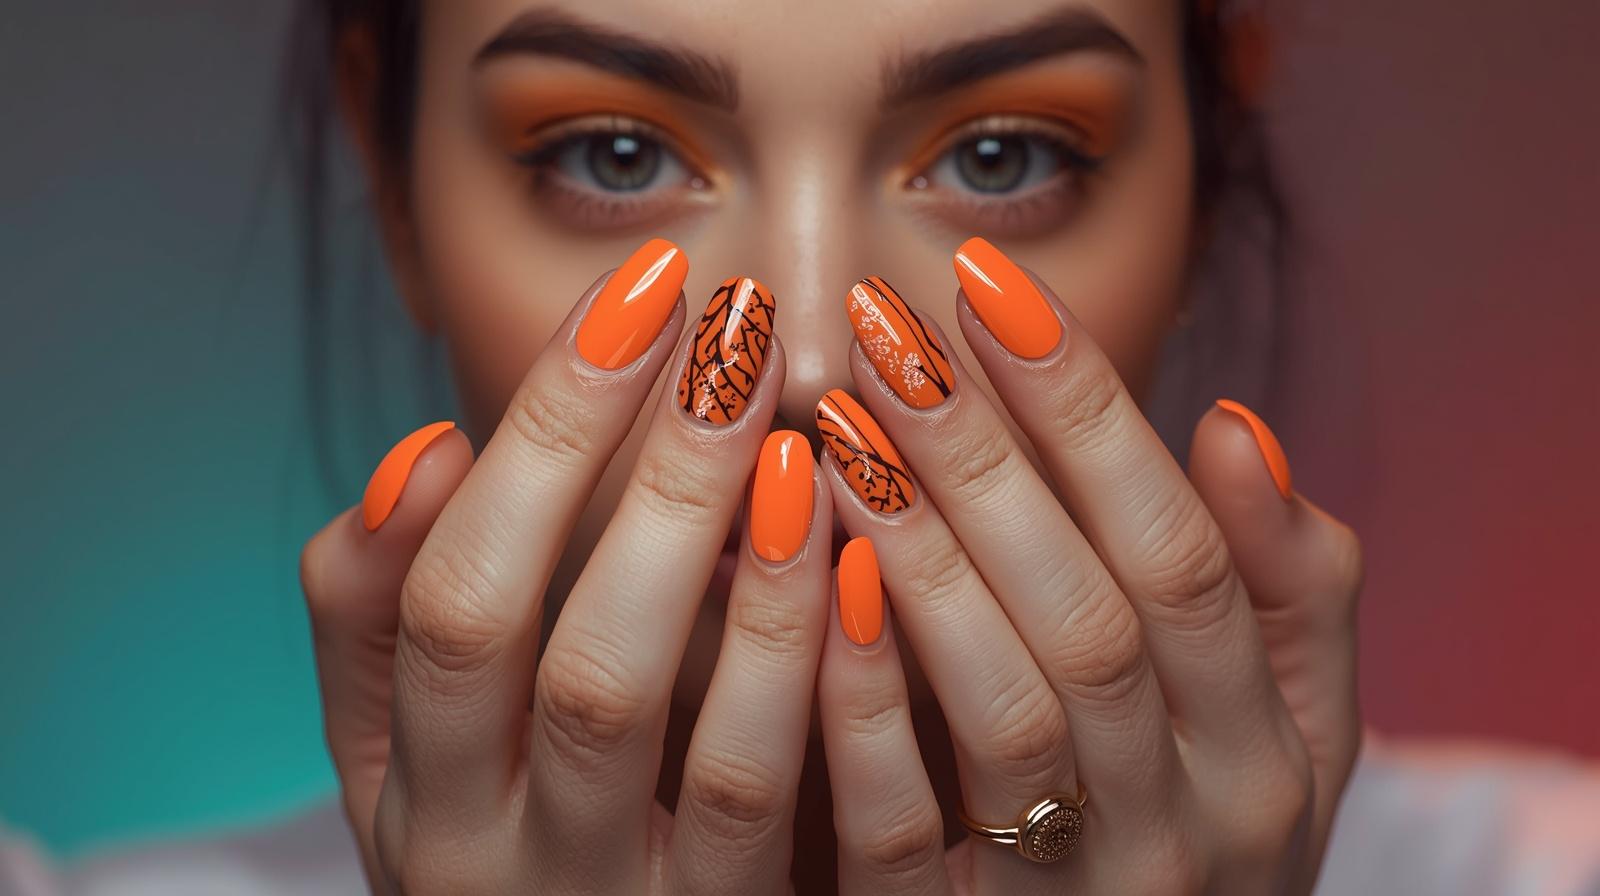
Neon mango orange is the spring break color of 2026 — saturated, warm, and almost fluorescent in direct sunlight. It’s the shade of a freshly cut mango on a poolside fruit platter, and it photographs with an intensity that makes every beach photo look like it was taken in golden hour. This is a bold nail design idea that suits every skin tone and screams “I am on vacation and I am thriving.” Wear it on short square or medium oval nails for the most wearable result.
How to Create This Look:
- Step 1: Apply a white base coat — non-negotiable with neon shades, as it amplifies the fluorescent quality and prevents the color from looking muddy over the natural nail.
- Step 2: Apply two to three coats of neon mango orange, drying fully between each coat — neon polishes often need an extra coat for full opacity.
- Step 3: Seal with a thick, high-gloss top coat to intensify the color depth and protect it from poolside wear.
2. Ocean Wave Ombre Nails
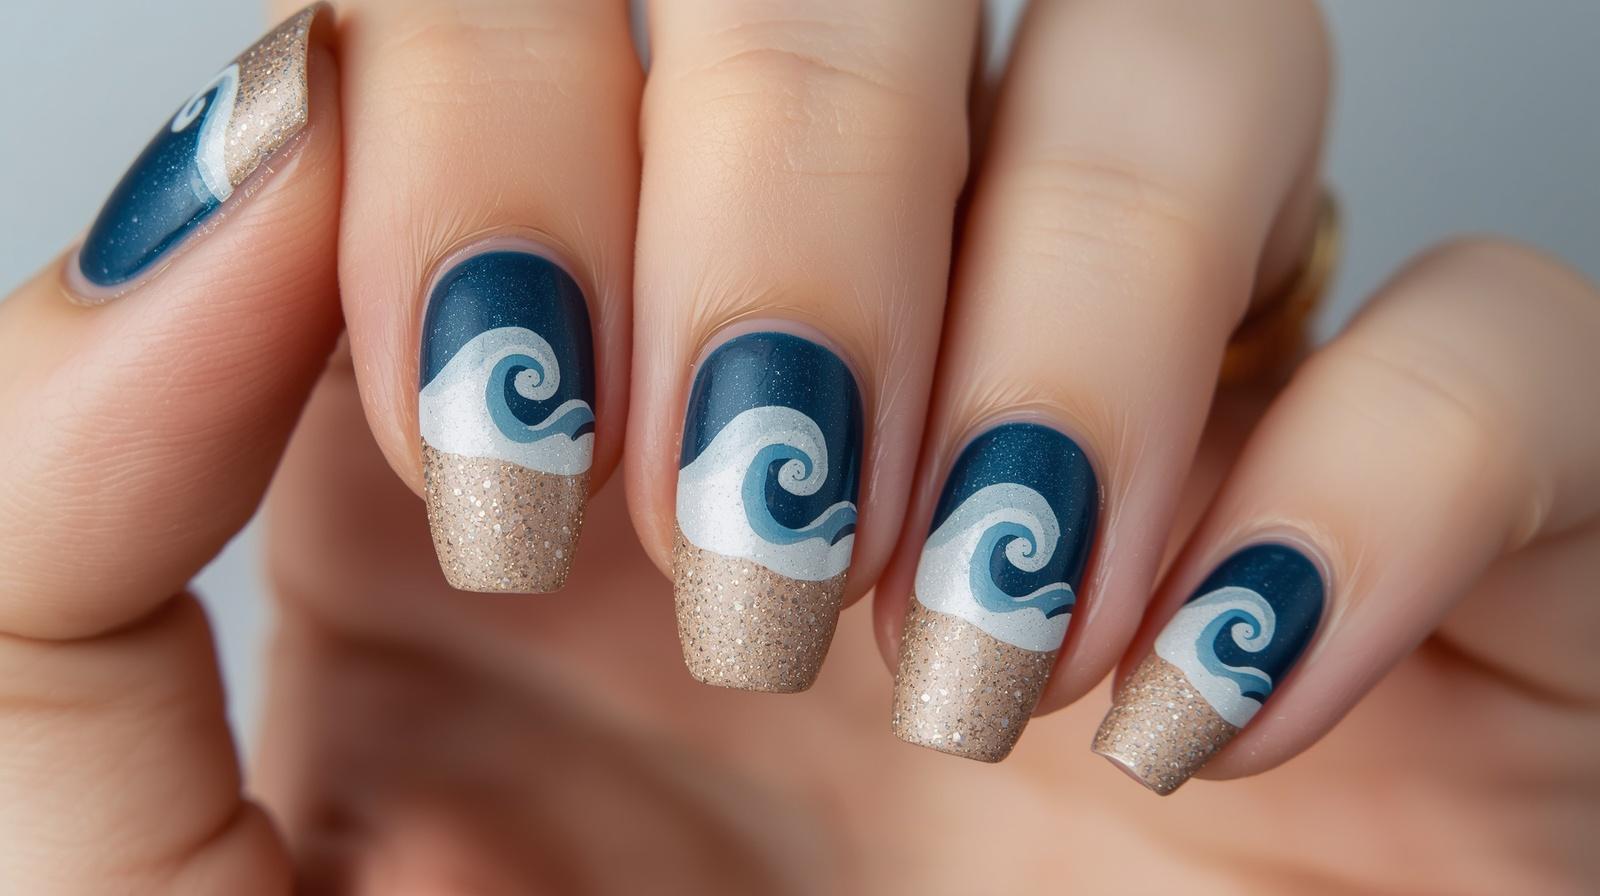
A gradient that moves from a deep aquamarine at the nail base through turquoise and into a foamy white at the tip mimics the exact color transition of an ocean wave breaking on shore. It’s one of the most visually arresting nail design ideas for spring break 2026 — deeply specific to the beach setting and genuinely beautiful in a way that a single solid color can’t replicate. Wear it on medium almond or coffin nails for maximum wave effect.
How to Create This Look:
- Step 1: Apply a deep aquamarine base across all nails and let dry completely.
- Step 2: Load a makeup sponge with turquoise from the base-to-mid section and sheer white from mid-to-tip, then dab onto the nail repeatedly until the gradient builds smoothly from dark at the base to white at the tip.
- Step 3: Clean edges, apply a glossy top coat to smooth the gradient bands and add the glassy depth of real water.
3. Tropical Fruit Slice Accent Nails
Hand-painted fruit slices — a watermelon on the thumb, a lemon on the index, a lime on the middle, an orange on the ring finger, and a strawberry on the pinky — create a full five-nail fruit platter set that’s playful, colorful, and completely specific to the vacation context. Each fruit is painted as a simple cross-section slice using basic shapes and bold colors. It’s the kind of nail design that gets photographed by strangers at the pool bar. For more bright nail color guidance matched to skin tone, see our spring nail ideas by skin tone guide.
How to Create This Look:
- Step 1: Apply a white base across all nails and dry fully — the white background makes every fruit color pop at its maximum saturation.
- Step 2: Using a small round brush, paint each fruit’s base color — bright red for watermelon, yellow for lemon, green for lime, orange for orange slice, red for strawberry — leaving a thin white border around each to suggest the fruit rind.
- Step 3: Add simple slice detail lines in each fruit using a fine liner brush — radiating lines for lemon/lime/orange, black seeds for watermelon and strawberry — then seal all nails with a glossy top coat.
4. Electric Blue Gel Nails
A flat, fully saturated electric blue in gel formula — no art, no embellishment, just pure bold color sealed in a chip-proof gel finish — is one of the most practical and impactful spring break nail ideas of 2026. The electric blue reads brilliantly against beach tans and in outdoor photos, and the gel formula means it will genuinely last the entire trip without a single chip. Simple, powerful, and completely vacation-appropriate on any nail shape or length.
How to Create This Look:
- Step 1: Apply a gel base coat and cure, then apply two full, even coats of electric blue gel polish, curing between each layer for a fully opaque, streak-free result.
- Step 2: Apply a gel top coat and cure — cap the free edge of each nail with the top coat to prevent tip chipping during water activities.
- Step 3: Apply cuticle oil immediately after curing to keep the surrounding skin healthy during saltwater and chlorine exposure throughout the trip.
5. Palm Tree Silhouette Nails

A sunset gradient base — hot pink melting into orange and yellow — with a stark black palm tree silhouette painted on one or two accent nails creates a spring break postcard directly on your fingertips. The silhouette technique requires only a fine liner brush and steady hand — no shading, no detail work, just the graphic outline of a palm against a vivid sky. A completely original nail art design idea for vacation 2026.
How to Create This Look:
- Step 1: Create a sunset ombre base using pink, orange, and yellow — sponge the three shades onto the nail from tip to base and build until the gradient is vibrant and seamless.
- Step 2: Once the ombre base is fully dry, use a very fine liner brush loaded with black polish to paint a palm tree silhouette — a curved thin trunk from the base upward, with frond shapes fanning out from the top.
- Step 3: Let the black silhouette dry fully before sealing with a glossy top coat — even a small smear will ruin the crispness of the silhouette.
6. Hot Pink and Neon Yellow Split Nails
Alternating between hot pink and neon yellow on each finger — no mixing, no gradients, just one color per nail in a bold alternating pattern — creates a set that looks like a handful of highlighter pens and photographs with nuclear energy in direct sunlight. This is the nail design for people who want their hands to look like they belong in a music festival lineup. Maximum impact, minimum effort, and completely unique in this content series.
How to Create This Look:
- Step 1: Apply a white base coat to all nails — both neons need this foundation to appear their most vivid and true-to-color.
- Step 2: Paint alternating nails in hot pink and neon yellow — thumb in pink, index in yellow, middle in pink, ring in yellow, pinky in pink — applying two coats per nail with full drying between.
- Step 3: Seal with a high-gloss top coat on all nails to unify the set and lock in the neon intensity.
7. Tie-Dye Swirl Nails
A tie-dye effect created directly on the nail using multiple vivid polish colors — pink, orange, turquoise, and white — swirled together while still wet to create an organic, spiral pattern that looks genuinely different on every single nail. The technique is fast, forgiving, and produces the kind of chaotic-beautiful result that’s completely at home in a spring break aesthetic. No two tie-dye nails in the world look identical, which makes this one of the most personal nail design ideas on this list.
How to Create This Look:
- Step 1: Apply a white base and let dry. Drop small amounts of two to three vivid colors — pink, orange, turquoise — side by side directly onto the nail surface using the brush applicator.
- Step 2: Immediately use a thin toothpick or dotting tool to swirl through all the wet colors in a circular spiral motion — work quickly before the polish starts to dry and the swirl loses its blended quality.
- Step 3: Let the swirl design dry completely without touching — the natural settling creates the tie-dye effect — then seal with a glossy top coat.
8. Sandy Beach Textured Nails
A warm sandy beige base coat with fine holographic sand glitter pressed into a tacky top coat layer creates a nail that genuinely looks and feels like sun-warmed beach sand. The tiny holographic particles in the glitter catch sunlight exactly the way real quartz sand does — sparkling in direct light and going calm in shade. It’s the ultimate stealth-vacation nail: subtle enough to be wearable everywhere but specifically and unmistakably beach-coded.
How to Create This Look:
- Step 1: Apply two coats of a warm sandy beige polish and let dry completely.
- Step 2: Apply a layer of clear nail glue or tacky top coat while still wet, then lightly press fine holographic glitter — in gold and sand tones — across the entire nail surface using a silicone brush.
- Step 3: Let the glitter set for thirty seconds, tap off excess, then apply two coats of glossy top coat to seal all glitter particles smooth and flat against the nail surface.
9. Press-On Vacation Nails — Instant Beach Set
High-quality press-on nails have become genuinely indistinguishable from salon sets in 2026 — and for spring break, they’re actually the smarter choice. You can apply them the night before you leave, they last ten to fourteen days with proper prep, and if one pops off at the beach you simply press it back on with a new adhesive tab. The best spring break press-on sets feature pre-designed tropical art, bright solids, or ocean-themed ombres that would take hours to replicate in a salon. Look for the KISS or Static Nails short coffin sets in “Neon Paradise” or “Ocean Drive” colorways specifically for 2026 vacation aesthetics.
How to Create This Look:
- Step 1: Prep natural nails thoroughly — remove all old polish, push back cuticles, lightly buff the surface of each nail, and wipe clean with acetone to remove all oils before applying.
- Step 2: Select the correct size press-on for each finger, apply a thin layer of nail glue or adhesive tab to the natural nail, and press each artificial nail down firmly for thirty seconds, working from the cuticle end downward to prevent air bubbles.
- Step 3: Once all nails are applied, apply a thin layer of clear top coat over the entire nail surface including the press-on edges to seal and extend adhesion by several extra days.
10. Coral Reef Nail Art
Inspired by the vivid, layered color of tropical coral reefs, this design builds a coral-toned base with hand-painted coral branch shapes, tiny fish silhouettes, and bubble dots across two or three accent nails while remaining solid on the others. The color palette — warm coral, deep teal, and white — captures the exact visual richness of underwater reef ecosystems. An ambitious but achievable nail art design idea that makes a genuinely breathtaking spring break set.
How to Create This Look:
- Step 1: Apply a warm coral or deep teal base across all nails — alternate between the two colors if you want more visual dynamism — and dry completely.
- Step 2: On accent nails, use a thin liner brush to paint branching coral shapes in a contrasting color — white on teal, deep coral on lighter coral — and add tiny fish shapes using two teardrop strokes meeting at the tail.
- Step 3: Scatter tiny white bubble dots around the coral branches using a fine dotting tool, let all art dry fully, then seal with a glossy top coat.
11. Bright Red Vacation Nails
There is no nail color that photographs better at a beach destination than a perfectly saturated, true red. It pops against every background — blue water, white sand, terracotta buildings, tropical greenery — and it suits every skin tone with equal power. In 2026, the red nail design idea for spring break is specifically a glossy, lacquered, almost candy-red rather than a deep or dark red — it should look like something you’d see dripping off an ice lolly in the sun. Vacation red. Unapologetically perfect.
How to Create This Look:
- Step 1: Apply a base coat and let dry, then cap the free edge of each nail with two thin coats of a true candy-red polish — capping the edge from the very first coat prevents early tip chipping in active vacation conditions.
- Step 2: Apply a third coat if needed for full opacity, drying fully between each layer to prevent bubbling or streaking.
- Step 3: Apply two coats of a domed, high-gloss top coat for the lacquered candy finish — the double top coat also significantly extends chip resistance during water activities.
12. Holographic Nail Design Ideas for Spring Break
A full holographic chrome nail — shifting through rainbow spectrums as your hand moves in sunlight — is one of the most physically spectacular things your nails can do outdoors on a spring break trip. Every outdoor photo becomes a prism. Every candid shot catches the rainbow shift mid-movement. In direct beach sunlight, holographic nails don’t just look good — they look like something supernatural. This is the nail for someone who wants their hands to be the most interesting thing in every photo they’re tagged in over break.
How to Create This Look:
- Step 1: Apply a gel base coat and cure, then apply two layers of a silver or clear gel base to create the reflective foundation the holographic powder needs to adhere to — cure between each layer.
- Step 2: Apply a no-wipe gel top coat and cure fully, then immediately rub a holographic chrome powder over the nail using a silicone eyeshadow brush in firm circular motions until the rainbow shift is fully visible.
- Step 3: Seal with a gel top coat and cure — the top coat locks the holographic powder in place while preserving its full spectrum-shifting quality in outdoor light.
13. Checkered Neon Nails
A checkered pattern in two vivid neon shades — electric green and hot pink, or neon blue and neon orange — is a retro-meets-rave-meets-spring-break nail design idea that looks like the entire vacation energy distilled into a manicure. Unlike pastel checkerboard seen earlier in this series, the neon version is deliberately aggressive in its color saturation — it’s made to be seen from across the pool. Bold, graphic, and completely current for 2026.
How to Create This Look:
- Step 1: Apply a white base and let dry, then apply your first neon color across the entire nail — two full coats for opacity — and dry completely.
- Step 2: Create a grid using fine nail tape strips, then fill alternating squares with your second neon color. Peel all tape while the second color is still wet.
- Step 3: Clean any bleeding with a fine acetone brush, let dry fully, then seal with a single thick coat of high-gloss top coat.
14. Sea Glass Green Nails
Sea glass green — a muted, translucent jade-to-seafoam shade that looks like actual ocean-worn sea glass — is the sophisticated alternative to neon for the spring break traveler who wants something beachy but wearable in every setting from waterfront restaurant to evening rooftop. The slightly translucent, milky finish in this particular green catches the light in a way that reads as completely organic and ocean-derived. A unique spring nail design idea that nobody else in this series has used. For similar color-based matching guidance, check our simple spring nails guide for more advice on choosing wearable single-color designs.
How to Create This Look:
- Step 1: Apply a base coat, then two to three thin layers of a sheer sea glass green jelly polish — building the translucent layers gradually rather than trying to achieve opacity, since the sheer depth is the whole design.
- Step 2: Let each layer dry fully between applications — rushing this causes the jelly layers to streak and lose their translucent quality.
- Step 3: Seal with an ultra-glossy top coat to give the nails that smooth, tumbled sea glass finish that catches light like polished jade.
15. Sunrise Gradient Nails
Every spring break morning starts with a sunrise — and this gradient captures the exact color sequence of an early beach sunrise: warm pink at the base that moves through soft peach and golden yellow into a pale white at the tip. Unlike the typical ombre which draws attention to the gradient transition, the sunrise gradient is about the warmth and luminosity of the whole nail — the visual equivalent of that feeling when the sun first hits the water. One of the most romantic and genuinely beautiful spring break nail design ideas of 2026. For more gradient and ombre techniques, our April nails 2026 guide covers the sunset ombre method in detail.
How to Create This Look:
- Step 1: Apply a warm blush pink as your base color across all nails and let dry — this is the darkest point of your sunrise gradient at the nail base.
- Step 2: Load a sponge with soft peach in the middle section and pale golden yellow blending into sheer white at the tip, then dab onto the nail from the middle upward — build the gradient in three to four sponge applications until it transitions smoothly from pink through peach and yellow to white.
- Step 3: Apply a glossy top coat to unite all gradient layers and give the nails the luminous, glowing quality of actual morning light.
How to Choose Your Spring Break Nail Design
Before choosing your spring break nail design for 2026, ask yourself one practical question first: how long is your trip, and will you have access to nail tools if something chips or breaks? If you’re traveling for a week or more, gel nails or a professional set are by far your best investment — they genuinely won’t chip during water activities when properly applied and sealed. If you’re doing your own nails before a shorter trip, go for a neon solid or the sunrise gradient — both are fast to apply, easy to touch up, and look great even when slightly grown out. Press-on nails are the smartest option for a trip under a week when you want salon-quality art without the salon timing. The neon and holographic designs photograph best in the strongest outdoor light — noon pool shots, beachside candids. The ocean wave, coral reef, and sea glass designs look most stunning in the soft light of early morning or late afternoon. Either way, always bring a small bottle of your chosen top coat in your carry-on — a single swipe every two to three days makes any spring break manicure last the full trip.
Best Products to Achieve This Look
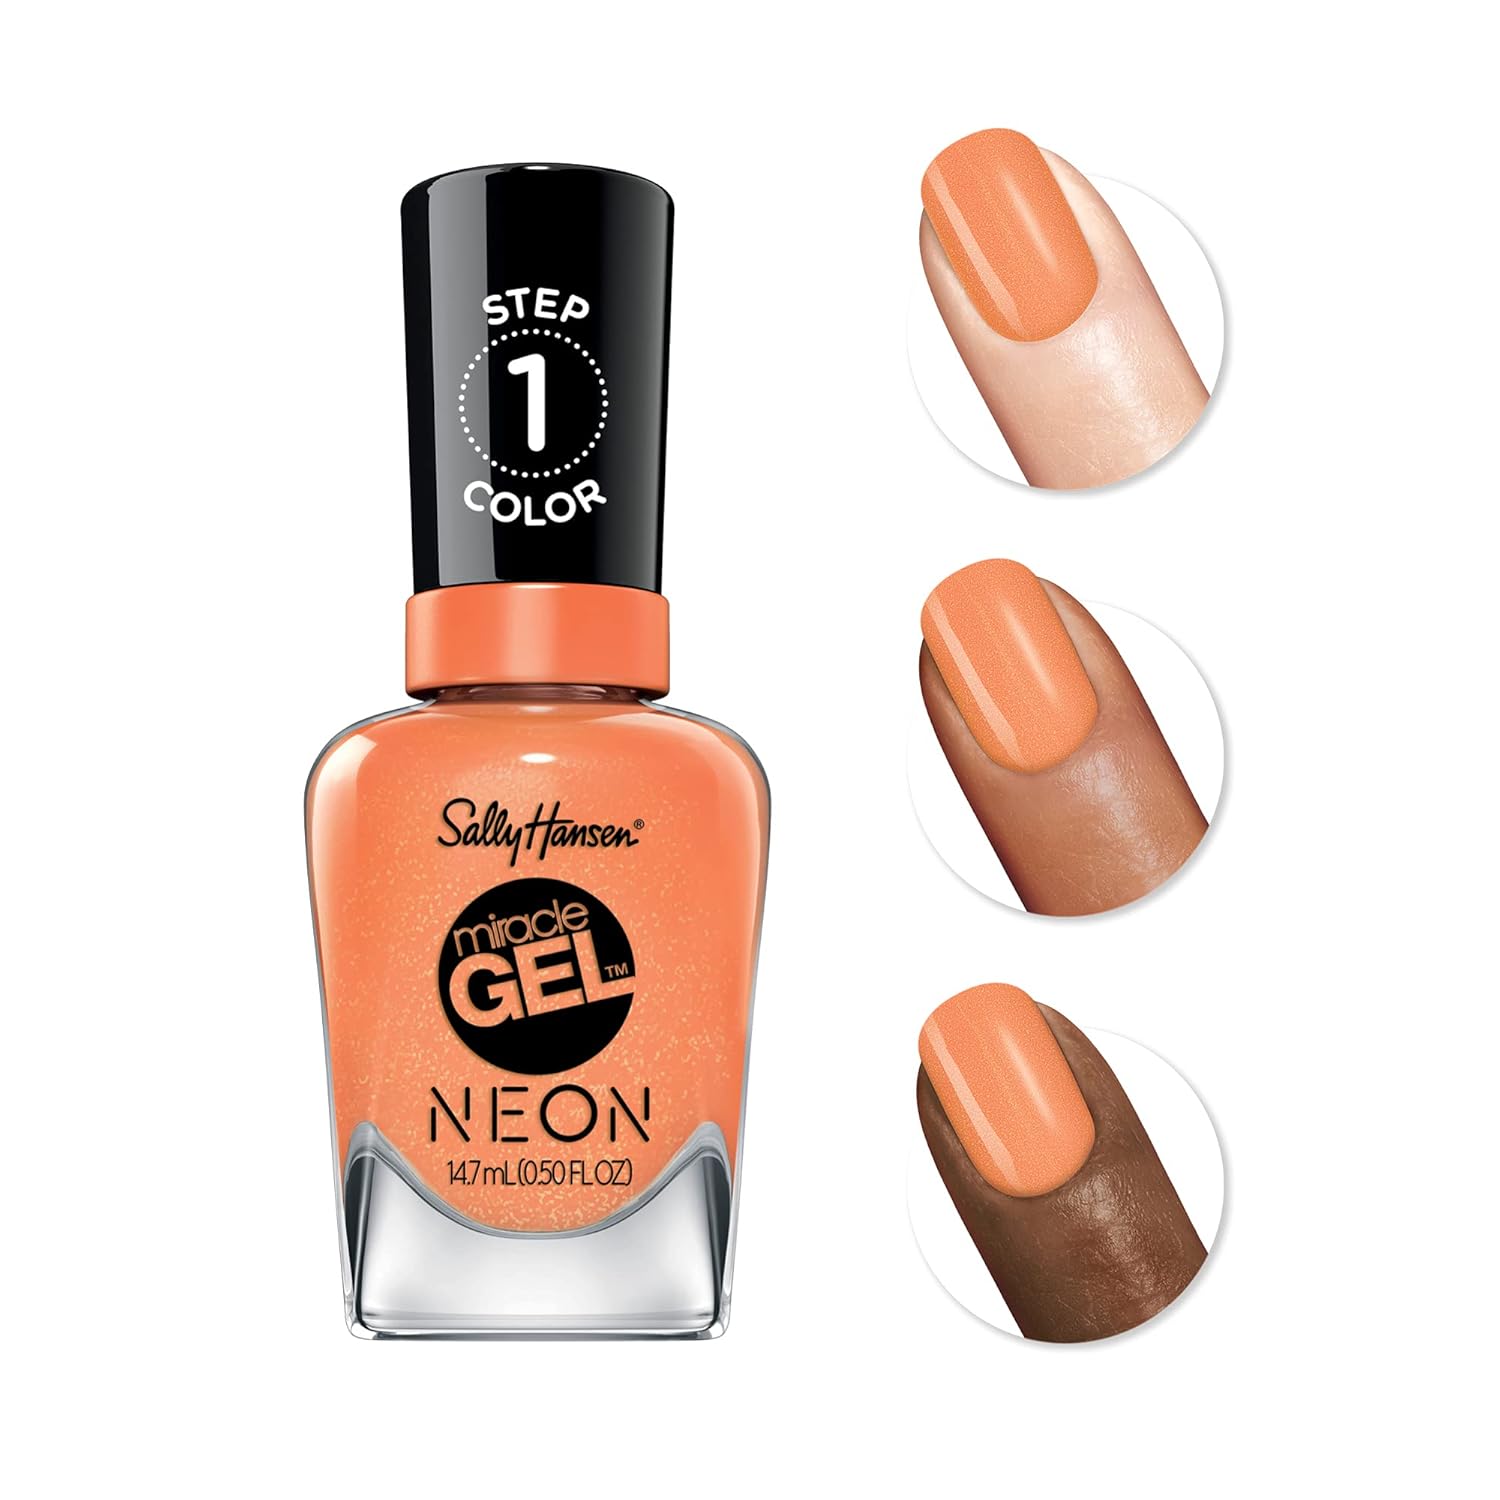
🛒 Sally Hansen Miracle Gel — Neon Collection
Why we love it: Sally Hansen’s neon Miracle Gel shades deliver genuine fluorescent-level color payoff in a no-lamp gel formula that lasts up to fourteen days — making it the ideal product for the neon mango, electric blue, hot pink/yellow, and bright red designs in this guide. The formula is water-resistant from day one and doesn’t dull under pool or ocean exposure the way regular polish does within hours.
Best for: Anyone wanting vacation-proof neon nails without bringing a UV lamp or booking a salon appointment before their trip.
→ Find it on Amazon: Sally Hansen Miracle Gel Neon Collection
🛒 Static Nails Reusable Pop-On Manicure — Vacation Sets
Why we love it: Static Nails’ pop-on sets are made from real salon acrylic and are genuinely reusable — you can wear them for the entire trip, remove them without damage, clean them, and wear them again. Their vacation-specific sets include tropical nail art, ocean ombres, and neon designs that would require professional execution to replicate at home. The adhesive tabs hold through pool and ocean exposure without lifting at the edges.
Best for: Anyone who wants a premium, professionally designed vacation nail set without a salon appointment — especially the press-on and tropical fruit designs in this guide.
→ Find it on Amazon: Static Nails Reusable Pop-On Manicure Sets
Frequently Asked Questions
What nail colors are best for spring break 2026?
The best spring break nail colors for 2026 are neon mango orange, electric blue, hot pink, holographic chrome, candy red, and sea glass green — all of which photograph brilliantly in outdoor natural light and maintain their visual impact against beach, pool, and tropical destination backgrounds better than pastels or muted tones.
What nail designs look best at the beach?
Bold single colors in gel formula, ocean wave ombres, holographic chrome nails, and neon checkered designs all look best at the beach because high-contrast and light-reflective finishes read more powerfully in direct outdoor sunlight than soft or matte designs, which can look flat and underwhelming in strong midday light.
Should I get gel or acrylic nails for spring break?
Gel nails are the better choice for spring break if you want a natural feel with good durability — they last two to three weeks, flex with daily beach activity, and don’t require fills; acrylic sets are better if you want dramatic length or intricate 3D art that needs a stronger structural base to survive an active vacation.
How do I protect my nails on vacation?
Reapply a quality top coat every two to three days, wear waterproof gloves for any prolonged water activity, apply cuticle oil daily to counteract the drying effect of saltwater and chlorine, and avoid using your nail tips as tools — these four habits alone extend any spring break manicure by four to seven additional days compared to no aftercare.
Final Thoughts
Spring break nails 2026 are about one thing above all else: nails that make the vacation feel more alive. Whether you choose the holographic chrome that turns every beach photo into a rainbow moment, the neon mango that pops against every background on earth, or the coral reef art that tells the story of exactly where you are — your nails should look like they belong exactly where you are. Pack your top coat, book your set, and go have the spring break your nails deserve. Drop your final look in the comments when you’re back!
