

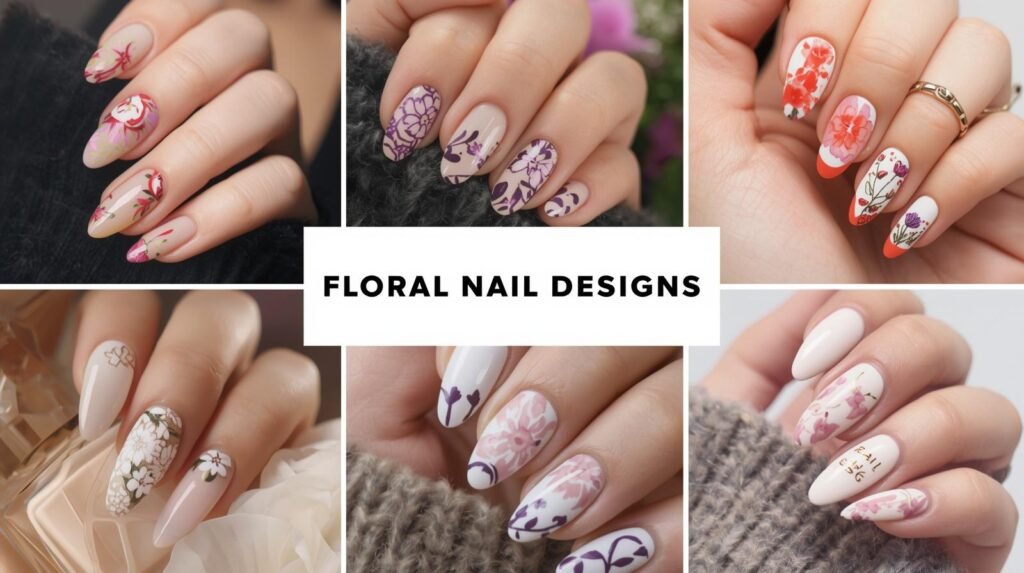
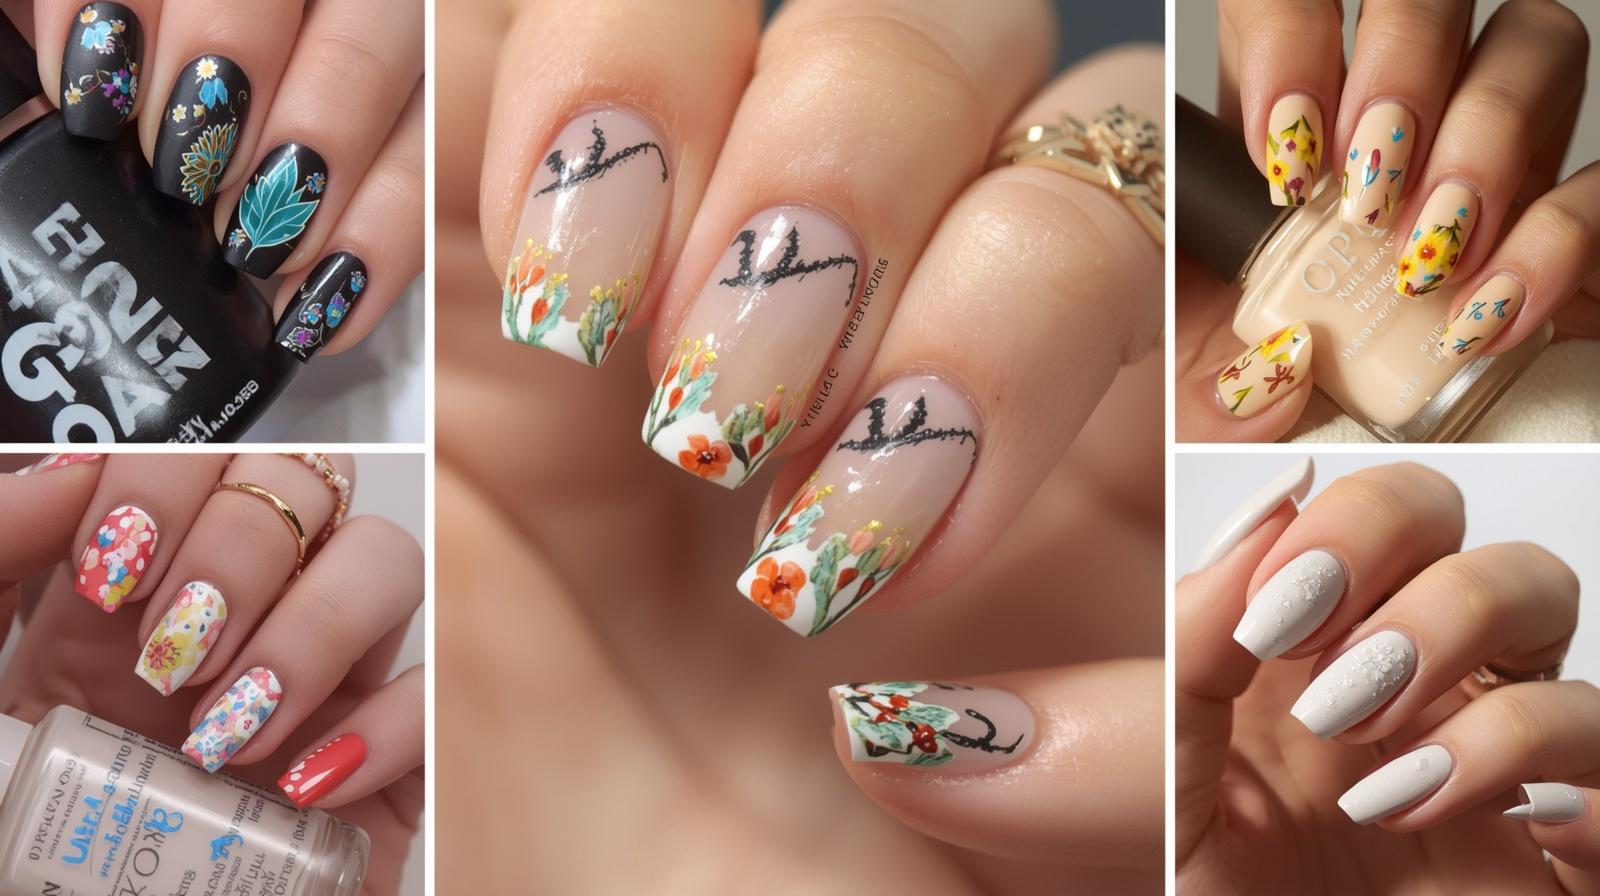
Floral nail designs in 2026 range from simple hand-painted daisies on a nude base to intricate 3D sculpted blooms encased in gel — and the most popular styles right now include watercolor botanical prints, negative space flower outlines, pressed petal encapsulations, and single-stroke rose art that looks professional even as a DIY. If you want beautiful flower nails this spring, this guide gives you 15+ original ideas, broken down by style and difficulty, with exact steps for every design so you can recreate any look at home or bring it straight to your nail tech.
Why Floral Nail Designs Are Dominating 2026
Floral nails have always been a spring staple — but 2026 has elevated them into a full art movement. The shift happened because nail artists started treating flowers less as decoration and more as the main event. You’re no longer just adding a daisy to a pink base. You’re painting entire meadow scenes, layering translucent petal overlays, sculpting 3D blooms, and using negative space so cleverly that the bare nail becomes part of the flower itself. These floral nail design ideas aren’t just trendy — they’re genuinely creative, and they photograph in a way that stops the scroll every single time. Whether you lean minimalist or maximalist, there’s a flower nail design idea in this guide built exactly for you.
15+ Floral Nail Design Ideas for 2026
1. Single-Stroke Rose on Ivory
A single loose rose painted in three confident brush strokes on an ivory base — no outlining, no detail work, just the impressionistic shape of a bloom the way a real artist would sketch it. The imperfection is the beauty. Use deep rose for a classic look or dusty mauve for something more editorial. Works on any nail length and takes under five minutes per nail once you practice the stroke.
How to Create This Look:
- Step 1: Apply two coats of warm ivory polish and dry completely.
- Step 2: Load a flat nail art brush with deep rose and place it flat against the nail center — rotate the brush slightly in a C-curve to form each petal, building three curved strokes into a loose rose shape.
- Step 3: Add a tiny yellow or cream dot at the rose center, dry fully, then seal with glossy top coat.
2. Negative Space Flower Outline Nails
Instead of painting a filled flower, you outline the petals with a fine liner brush and leave the interior bare — so the natural nail shows through each petal like a stained-glass window effect. In black or deep navy on a nude base, this looks architectural and editorial. In gold on a white base, it reads as delicate and bridal. One of the most original flower nail design ideas of 2026 for short and medium nails.
How to Create This Look:
- Step 1: Apply a sheer nude base and dry fully — the bare nail will show through the petal outlines.
- Step 2: Using a fine liner brush in your chosen color, draw petal outlines freehand — five rounded oval shapes arranged in a fan pattern, leaving each interior completely empty.
- Step 3: Add a small filled circle at the flower center, let dry, and seal with a glossy or matte top coat.
3. Wildflower Meadow Multi-Nail Scene
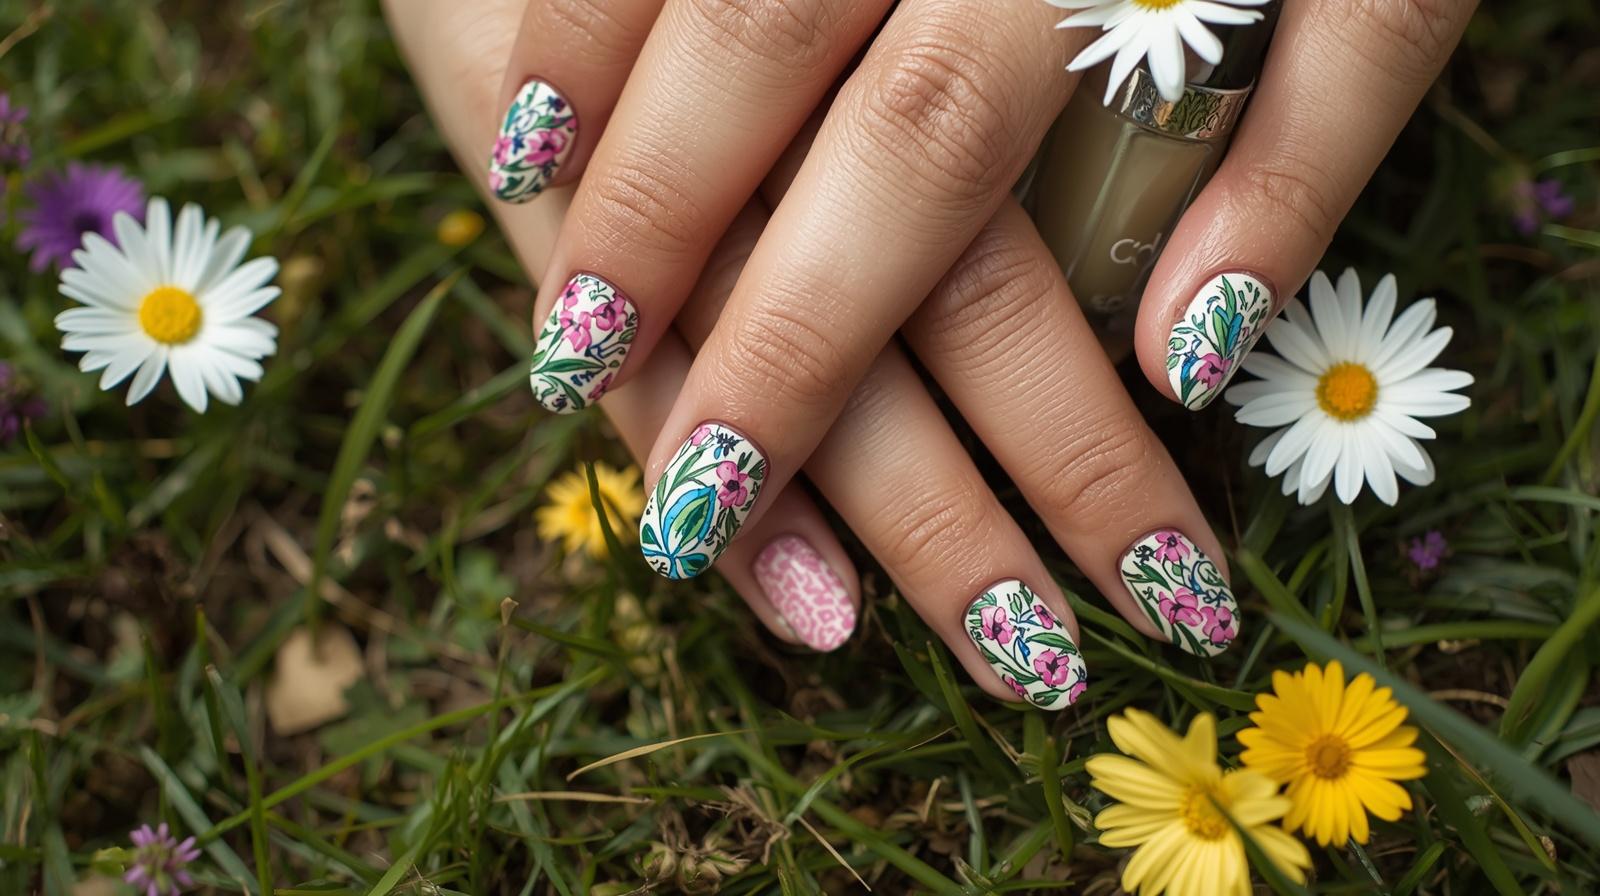
Rather than putting the same design on every nail, this style paints a continuous wildflower meadow scene across all five fingers — grasses on the pinky, small poppies on the ring finger, daisies on the middle, a larger bloom on the index, and a butterfly or bee accent on the thumb. It tells a complete visual story across your hand and looks like a miniature botanical illustration when all five nails come together.
How to Create This Look:
- Step 1: Apply a soft sage green or pale blue base across all nails and dry completely — this acts as sky or grass depending on the element painted over it.
- Step 2: Sketch your scene lightly first with a dotting tool as placement guide, then build each element nail by nail — green stems and leaves first, then layering flower heads in red, yellow, white, and orange on top.
- Step 3: Add fine detail lines and let the full scene dry before sealing each nail with a glossy top coat.
4. 3D Sculpted Flower on Coffin Nails
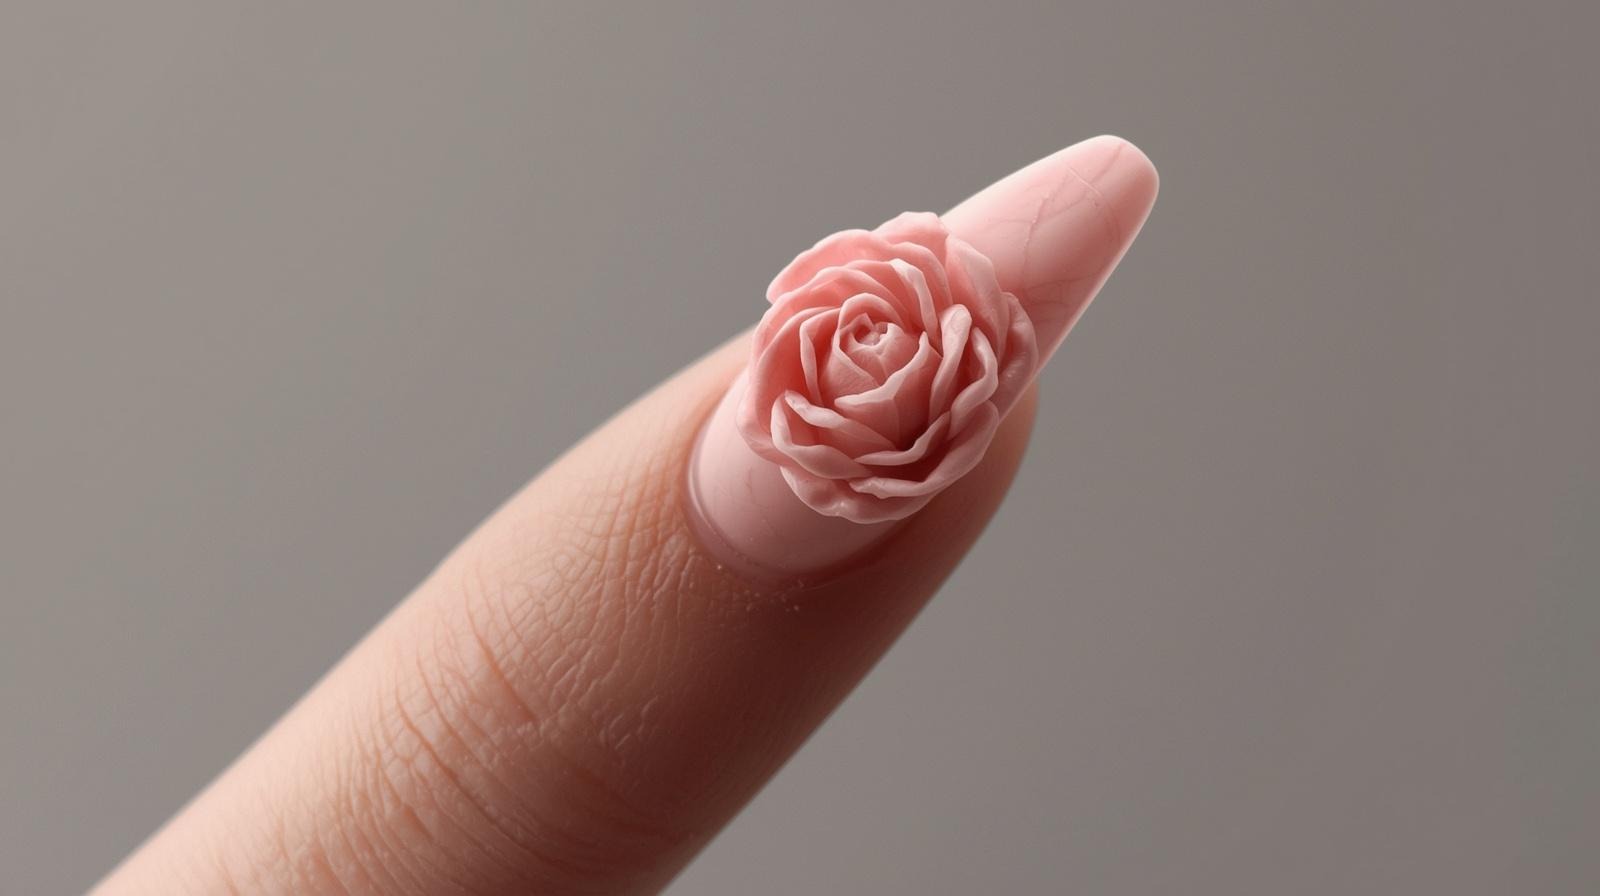
A single sculpted flower — built using acrylic or hard gel into an actual raised, three-dimensional shape — sits on the nail like a piece of jewelry rather than a painted design. The most popular version for 2026 is a small white or blush camellia perched near the cuticle on a clean nude or deep burgundy base. This is a salon design, but the finished result is genuinely unlike anything achievable with flat polish alone.
How to Create This Look:
- Step 1: Complete your base manicure on coffin extensions and cure fully — the base color should contrast clearly with the flower color you’re building.
- Step 2: Using a small ball of colored acrylic or hard gel builder, sculpt five individual petals near the nail base — press each flat with a silicone tool, shaping the edges into a soft oval and curving the sides upward slightly for dimension. Cure between each petal layer.
- Step 3: Add a tiny yellow or gold bead center using a dotting tool, cure fully, then seal the surrounding nail area with gel top coat — leave the 3D flower unsealed to preserve its matte, sculptural texture.
5. Pressed Flower Jelly Nails
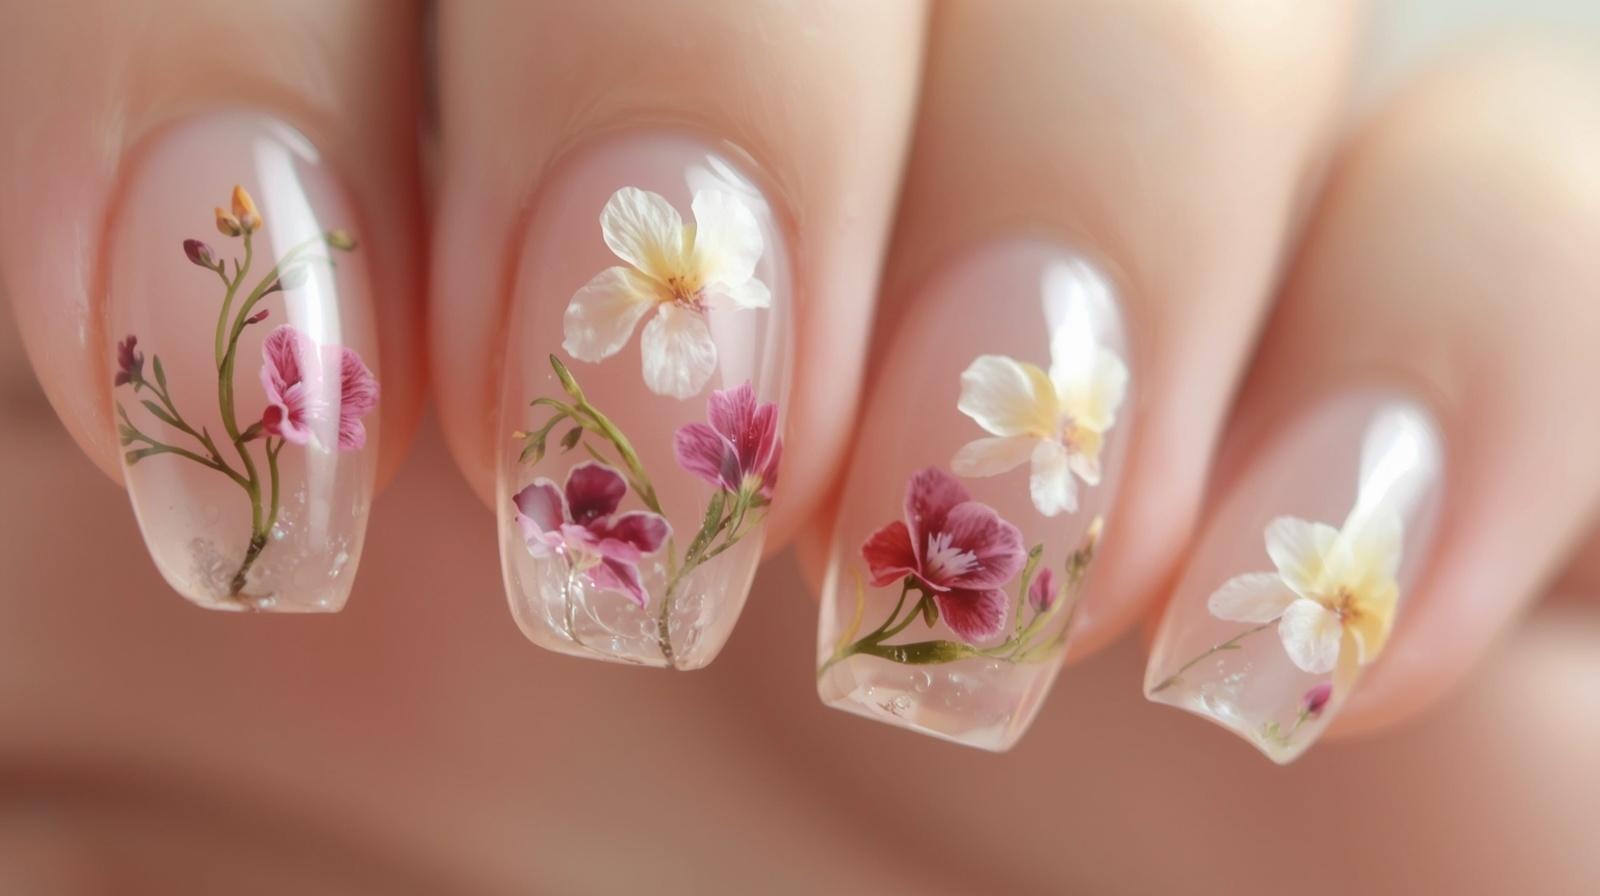
Real pressed flowers — tiny violets, baby’s breath, chamomile, or Queen Anne’s lace — suspended inside a sheer jelly gel base create nails that look like spring itself is literally inside your manicure. Each nail is completely unique because flower placement is never identical twice. The jelly base keeps everything looking fresh and translucent rather than heavy. A top-tier floral nail design idea that works for weddings, events, or anyone who wants genuinely memorable nails.
How to Create This Look:
- Step 1: Apply a sheer jelly gel base in blush, clear, or soft lavender and cure until just slightly tacky.
- Step 2: Place fully dried and pressed flower pieces onto the tacky gel surface using fine tweezers — position them thoughtfully, then seal with a generous layer of clear gel and cure fully.
- Step 3: Buff the surface smooth if needed, then apply a high-gloss top coat and cure for a glass-smooth, botanical finish.
6. Hibiscus Nails on Deep Berry
A bold, tropical hibiscus hand-painted on a deep berry or plum base creates one of the most striking floral nail design ideas of 2026 — the orange-red flower against the dark background reads as dramatic, confident, and completely unforgettable. This design suits deep and olive skin tones especially beautifully and works best on medium to long almond or coffin nail shapes where the hibiscus has room to fully open.
How to Create This Look:
- Step 1: Apply two coats of a deep berry or plum polish and dry fully.
- Step 2: Using a flat brush loaded with coral-orange, paint five large, slightly cupped petals in a fan arrangement — let each petal dry slightly before adding the next to prevent bleeding. Add thin red veining lines through each petal with a fine liner.
- Step 3: Paint a long yellow stamen extending from the flower center, add tiny pollen dots at the tip, then seal with a glossy top coat once the entire design is completely dry.
7. Botanical Ink Stamp Nails
Using a nail stamping plate with botanical motifs — fern fronds, lily outlines, poppy silhouettes — you can transfer crisp, detailed flower nail designs onto any base color in under two minutes per nail. The result looks precision-printed rather than hand-drawn, giving you a consistent, editorial result without advanced art skills. In black ink over dusty blue or cream, the effect looks like antique botanical illustration prints — deeply beautiful and very 2026.
How to Create This Look:
- Step 1: Apply and dry your base color — dusty blue, cream, or warm nude all work beautifully with black botanical stamps.
- Step 2: Apply stamping polish to the botanical plate design, scrape off the excess cleanly with the plate scraper, then pick up the image with the stamper and immediately roll it onto the nail in one smooth press-and-release motion.
- Step 3: Let the stamped design dry for sixty seconds before sealing gently with a glossy top coat applied in one quick swipe to avoid smearing the stamp.
8. Floating Petal Chrome Nails
A chrome powder base — rose gold or gold — with transparent painted petals layered on top creates the illusion that flower petals are drifting across a metallic surface. The chrome base glows through the sheer petal shapes, giving each bloom an almost holographic quality. It’s the most futuristic-meets-feminine floral nail design idea of 2026 and genuinely turns heads in any light condition. Best on medium almond or oval nails. For more chrome nail ideas that complement this look, check our spring nail ideas by skin tone guide.
How to Create This Look:
- Step 1: Complete a full chrome powder nail — rose gold or gold — over a gel base and cure. The mirror finish is your entire background.
- Step 2: Mix a tiny amount of clear gel with a drop of white or blush gel polish to create a translucent petal tint — paint loose, overlapping oval petal shapes across the chrome surface using a flat brush. Cure.
- Step 3: Apply a final gel top coat and cure — the chrome will glow through the translucent petals from beneath, creating depth that completely flat designs cannot replicate.
9. Watercolor Peony Nails
A loose, painterly peony — built from layered washes of blush, deep rose, and white rather than precise outlines — looks like a professional watercolor painting on each nail. The key is working wet-on-wet so the colors naturally bleed into each other the way real watercolor does on paper. No hard edges anywhere. Soft, romantic, and completely stunning on almond or oval nail shapes against a white base. One of the most pinned floral nail designs of the entire spring 2026 season. For more beginner-friendly floral approaches, our simple spring nails guide covers daisy and basic floral techniques in depth.
How to Create This Look:
- Step 1: Apply a bright white base and while the final coat is still slightly tacky, drop a small amount of diluted blush pink polish near the nail center — this will become the peony’s heart.
- Step 2: Working quickly while all layers stay wet, add touches of deeper rose around the blush center and pull each outward with a clean brush tip to form loose, flowing petals. Add tiny white highlights by pulling clean polish through the wet color.
- Step 3: Let the entire design settle and dry without touching — the natural blending creates the peony’s painterly depth — then seal very gently with one coat of matte top coat for a soft, gallery-worthy finish.
10. Micro Floral French Tips
Instead of a solid color tip, tiny hand-painted flowers are scattered along the smile line — small daisies, forget-me-nots, and dot-clusters that replace the traditional white band with a garden border effect. On a sheer nude base, this looks incredibly delicate and feminine. On a deep navy or black base, the tiny white flowers along the tip look bold and unexpected. A fresh take on french tip nail design ideas that nobody in this series has shown yet.
How to Create This Look:
- Step 1: Apply your base — nude, navy, or black — and let dry completely before any art begins.
- Step 2: Using a very fine liner brush, paint a loose line of tiny flowers along the tip edge: alternate between simple five-dot daisies, three-petal forget-me-nots, and single dot clusters to vary the texture naturally.
- Step 3: Add tiny green leaf dots between flowers using a dotting tool, let the full floral border dry, then seal with a glossy top coat.
11. Abstract Floral Ink Swirl Nails
This design blends flowing ink-style swirls with abstract flower shapes that are more suggested than literal — imagine cursive lines that happen to form petals, or spirals that unfurl into blooms without ever quite committing to a recognizable shape. In monochrome black on white it looks like Japanese calligraphy art. In teal or indigo on cream it feels bohemian and deeply original. One of the best creative nail design ideas for anyone who wants florals without the conventional prettiness.
How to Create This Look:
- Step 1: Apply a clean white or cream base and dry fully.
- Step 2: Load a fine liner brush with black or deep teal and draw flowing, continuous lines across the nail — let some lines curve into loose spirals, others branch into leaf shapes, and others form open petal-like fans without closing them into complete flowers.
- Step 3: Scatter small ink dots around the swirls to suggest pollen or falling petals, let dry fully, then seal with a glossy or matte top coat depending on your preferred finish.
12. Sunflower Nails on Warm Terracotta
A bold sunflower — golden yellow petals, deep brown center with texture detail — painted on a warm terracotta base creates a nail that looks like a late-spring afternoon in full sun. Unlike softer pastel florals, this combination is warm, grounded, and full of energy. It suits medium and deep skin tones particularly beautifully and works on both short square and medium almond nail shapes. A completely unique floral nail design idea that fits perfectly into the 2026 earth-tone aesthetic movement.
How to Create This Look:
- Step 1: Apply two coats of a warm terracotta polish and dry fully.
- Step 2: Using a flat brush loaded with saturated golden yellow, paint long, narrow petals radiating outward from a central point — overlap them slightly at the base to create the sunflower’s characteristic dense petal arrangement. Fill the center with dark brown using a small round brush.
- Step 3: Add texture to the brown center by stippling a slightly lighter brown over it with a sponge tip, let everything dry, then seal with a high-gloss top coat to make the golden petals really pop.
13. Floral Lace Overlay Nails
Using a stamping plate or a very fine liner brush, a delicate lace-like floral pattern is drawn across the nail in white over a nude or blush base — fine lines, open petals, and dot grid details that mimic the look of embroidered lace fabric. On a blush base, it reads as romantic and bridal. On a black base, it becomes gothic and striking. For more elegant floral nail design ideas across different aesthetics, visit our April nails 2026 guide which includes botanical ink stamp techniques and pressed petal designs.
How to Create This Look:
- Step 1: Apply your base color and dry fully. If using a stamp plate, apply white stamping polish, scrape the plate, and transfer the lace motif in one clean press.
- Step 2: If doing it freehand, use a hair-thin liner brush to draw repeating floral lace elements — open petal shapes, connecting dots, and fine line borders — building the pattern outward from one corner of the nail.
- Step 3: Seal the finished design very carefully with one thin coat of glossy top coat — apply it without pressure to avoid lifting fine white lines.
14. Ombre Base with Scattered Flower Accents
A gradient base — blush to lavender, or peach to coral — with five to eight tiny scattered flower accents dotted across the nail surface at random angles creates a nail that feels joyful, full, and genuinely spring-like without being overly structured. The ombre does the heavy lifting visually while the tiny flowers add texture and story. Easy enough for beginners, beautiful enough for any occasion.
How to Create This Look:
- Step 1: Create your ombre base using a makeup sponge with two complementary spring shades, building the gradient until smooth. Let dry fully.
- Step 2: Using a small dotting tool, place five-dot daisy clusters randomly across the nail surface — vary the flower sizes and angles so they feel scattered rather than arranged.
- Step 3: Add tiny yellow center dots to each bloom, let dry completely, then seal with a glossy top coat.
15. Dried Botanicals in Matte Gel
Tiny dried lavender sprigs, chamomile heads, or pressed fern fronds sealed under a matte gel top coat rather than gloss — the matte finish gives the dried botanicals a raw, earthy quality that looks more like fine art than a typical nail design. Against a warm ecru or off-white base, the brown tones of the dried plants look like ink illustrations. Against a deep forest green, they read as botanical specimens in a Victorian case. Completely original and genuinely high-value as a floral nail design idea for 2026.
How to Create This Look:
- Step 1: Apply a warm ecru or forest green gel base and cure fully.
- Step 2: Apply a thin, tacky gel layer without curing, then place fully dried botanical pieces — lavender sprig, chamomile head, or pressed fern — using tweezers. Position them with care, then seal with a layer of clear builder gel and cure.
- Step 3: Apply a matte gel top coat instead of glossy — the flat, raw finish over the dried botanicals gives the whole nail a preserved-specimen aesthetic that glossy top coat simply can’t replicate.
How to Choose Your Floral Nail Design
The right floral nail design idea comes down to three things: your skill level, your nail length, and the vibe you’re going for. If you’re a beginner, start with the scattered daisy ombre, the botanical stamp, or the micro floral French tip — all of these use minimal freehand technique but deliver a serious visual payoff. If you have some experience, the single-stroke rose and watercolor peony are very achievable with practice and produce results that look fully professional. Advanced nail artists or salon clients should look at the 3D sculpted flower, pressed petal jelly nails, and floating chrome petals — these require more materials and technique but the results are genuinely show-stopping. For nail length: short nails shine with negative space outlines, micro floral tips, and abstract swirls. Longer almond and coffin shapes are made for the full meadow scene, hibiscus statement nails, and 3D sculptured designs.
Best Products to Achieve This Look
Maniology Nail Stamping Kit — Botanical Collection
Why we love it: Maniology’s botanical stamp plates feature some of the most detailed and true-to-life floral motifs available — ferns, peonies, wildflowers, and lace patterns — with deep enough engraving to transfer cleanly every time. The kit includes the scraper, stamper, and two stamping polishes so you’re ready to create professional-looking floral nail art from the very first try.
Best for: Anyone wanting crisp, detailed floral designs without advanced freehand painting skills — the botanical stamp, lace overlay, and ink stamp designs in this guide all work perfectly with this kit.
→ Find it on Amazon: Maniology Nail Stamping Kit Botanical
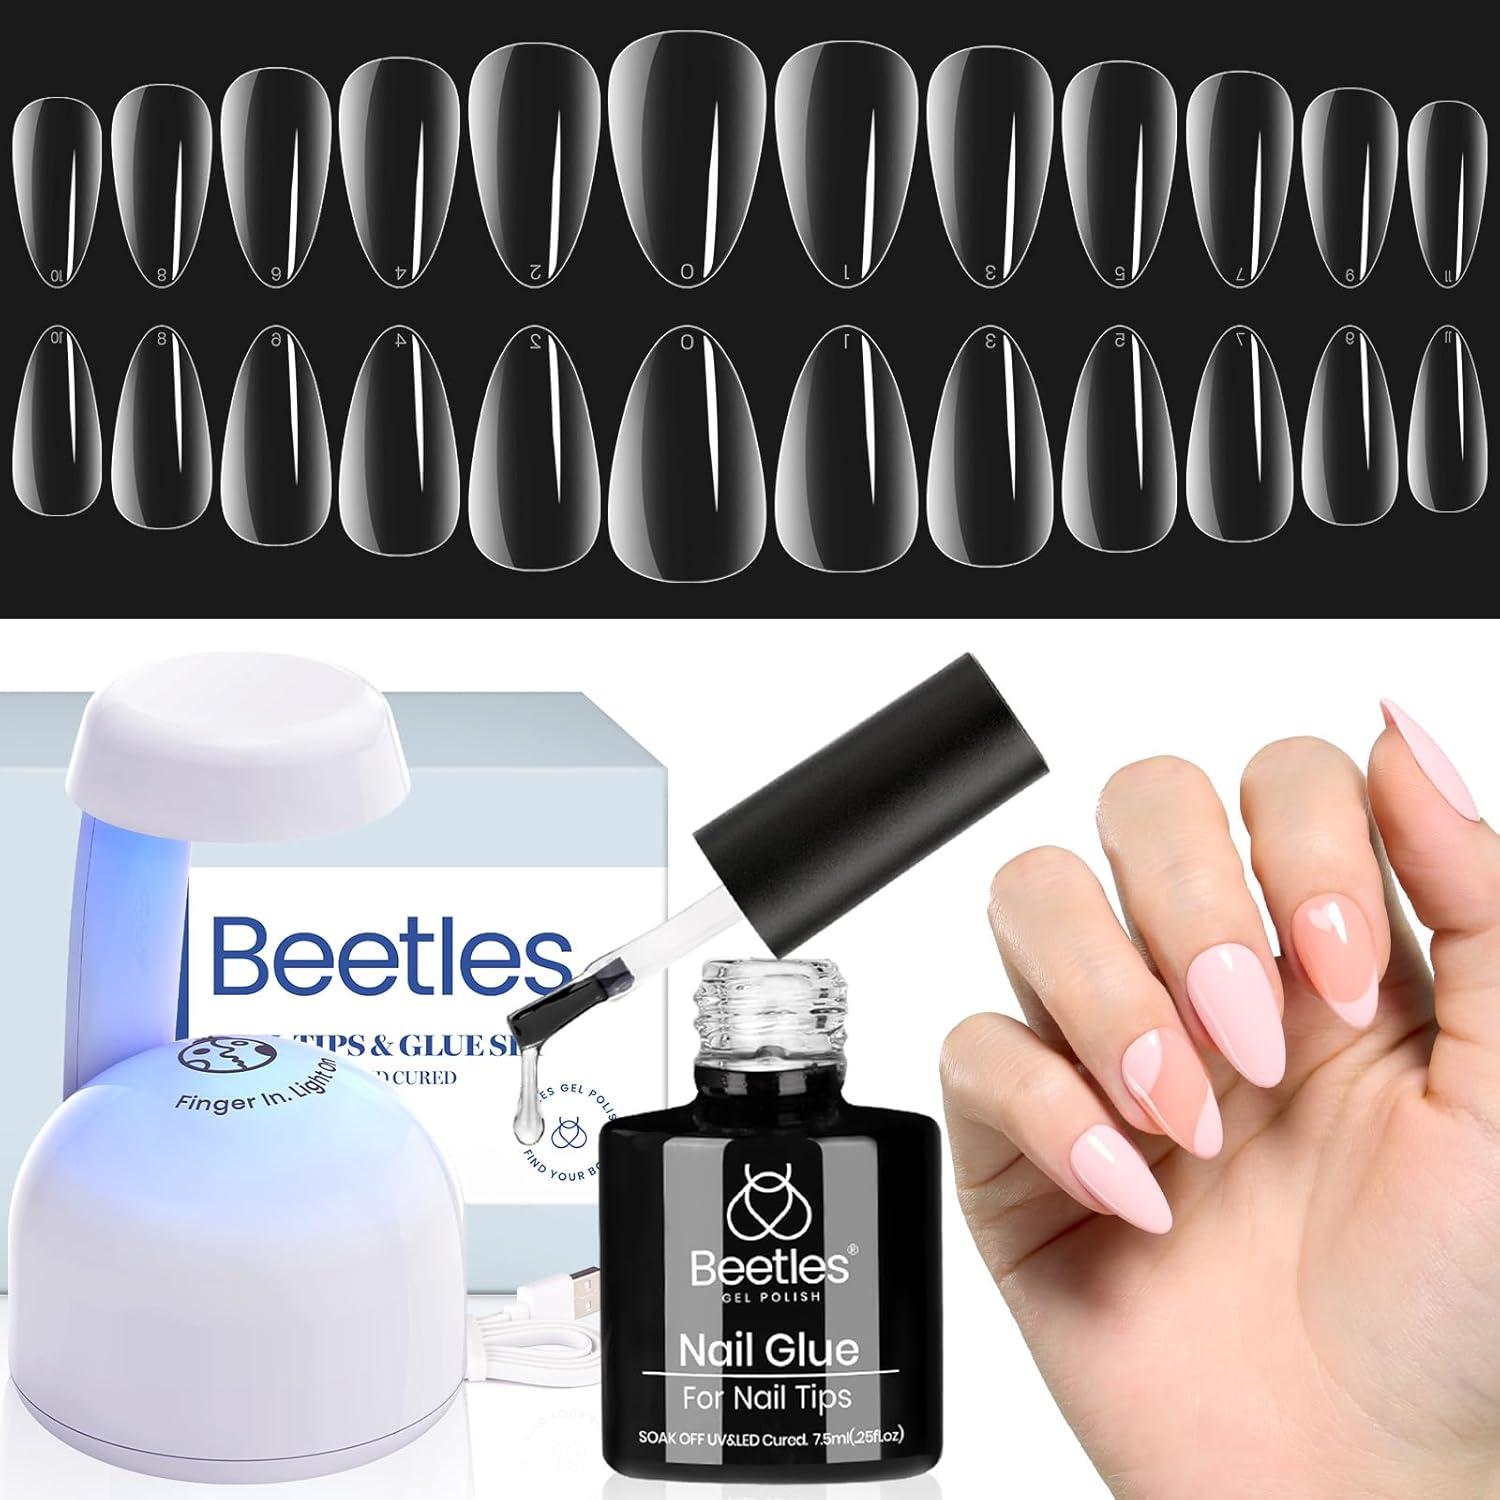
Beetles Gel X Nail Extension Kit — Clear Tips
Why we love it: For designs like the 3D sculpted flower and pressed botanical jelly nails, you need a clean, strong extension base to work on — and the Beetles Gel X system delivers salon-quality clear tips with a gel adhesive that bonds securely without drilling. The crystal-clear tip material shows through pressed flower elements beautifully and holds 3D designs without cracking or lifting.
Best for: Anyone wanting to take the encapsulated pressed flower or sculpted 3D bloom designs to the next level on extensions rather than natural nails.
→ Find it on Amazon: Beetles Gel X Nail Kit Clear Tips
Frequently Asked Questions
What are the most popular floral nail designs for 2026?
The most popular floral nail designs 2026 are pressed flower jelly nails, single-stroke rose art, watercolor peonies, negative space flower outlines, and 3D sculpted blooms — each trending heavily on Pinterest and nail art communities because they range from wearable-everyday to genuinely gallery-worthy statement designs.
Are floral nails hard to do at home?
Many floral designs in this guide are beginner-friendly — the daisy dotting tool technique, botanical stamp method, and scattered ombre flowers all require zero advanced skills; only the 3D sculpted and pressed encapsulated designs genuinely need salon experience to execute cleanly.
What nail colors go best with floral nail art?
Nude, white, and ivory bases make floral designs pop with maximum contrast and work for every flower style; deep bases like navy, burgundy, forest green, or black create dramatic high-contrast florals that suit bolder designs like the hibiscus, sunflower, and lace overlay looks.
How do I make floral nail art last longer?
Always seal floral designs with a high-quality gel or no-chip top coat applied in a thin, even layer — cap the free edge on each nail to prevent tip chipping, reapply top coat every three days, and avoid prolonged water exposure in the first two hours after completing the design.
Final Thoughts
Floral nail designs in 2026 are more creative, more varied, and more genuinely stunning than they’ve ever been. Whether you pick a five-minute daisy dotting design or book a salon session for 3D sculpted camellias, there’s a flower nail design idea in this guide that was made for your skill level, nail shape, and personal style. Save your favorites, grab your tools, and let your nails bloom this spring — drop your chosen design in the comments below!
